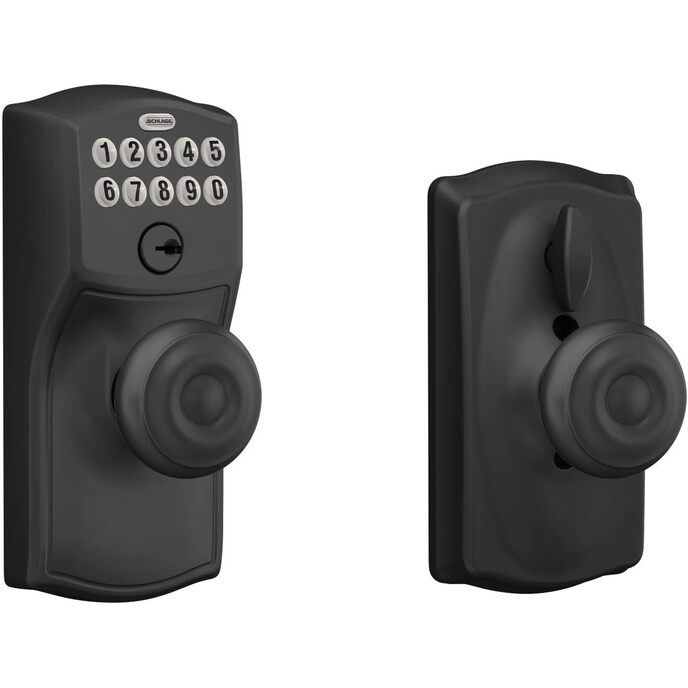
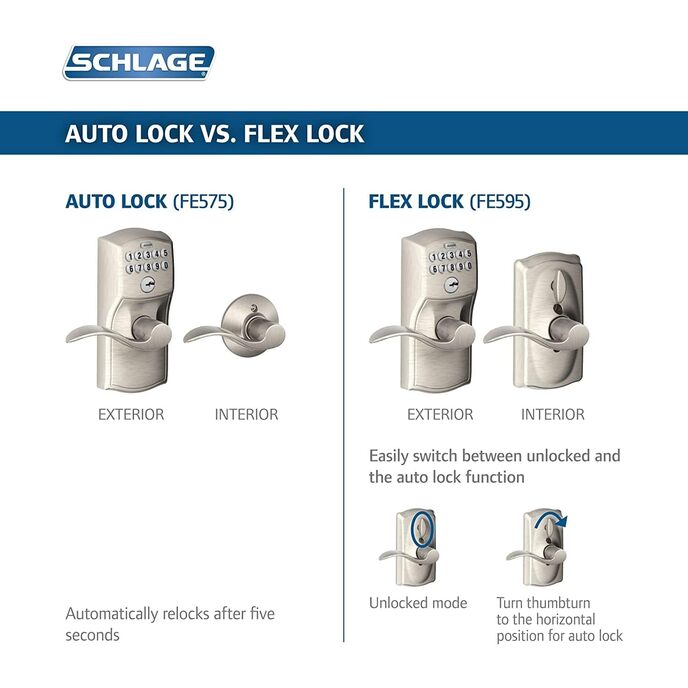
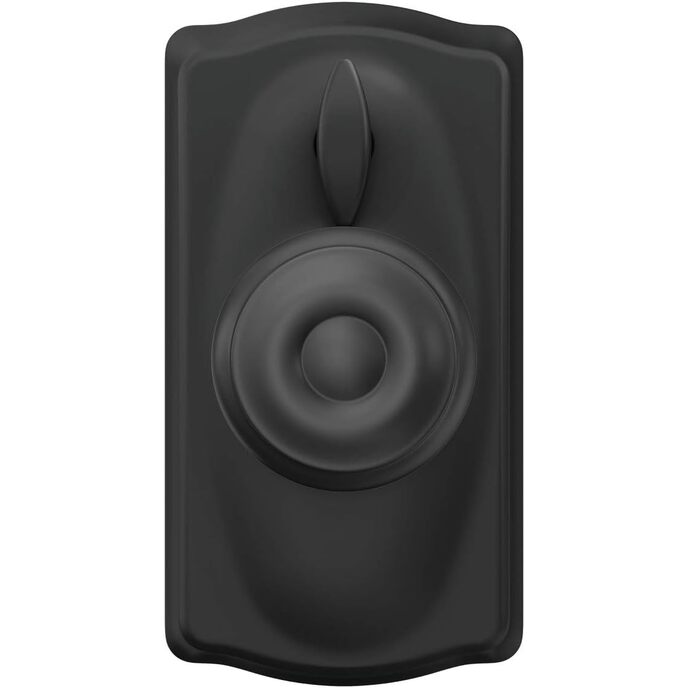
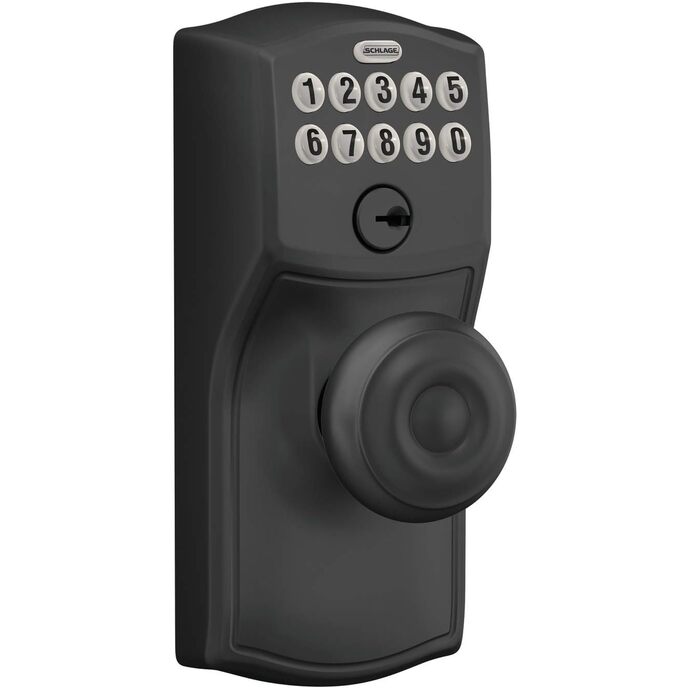
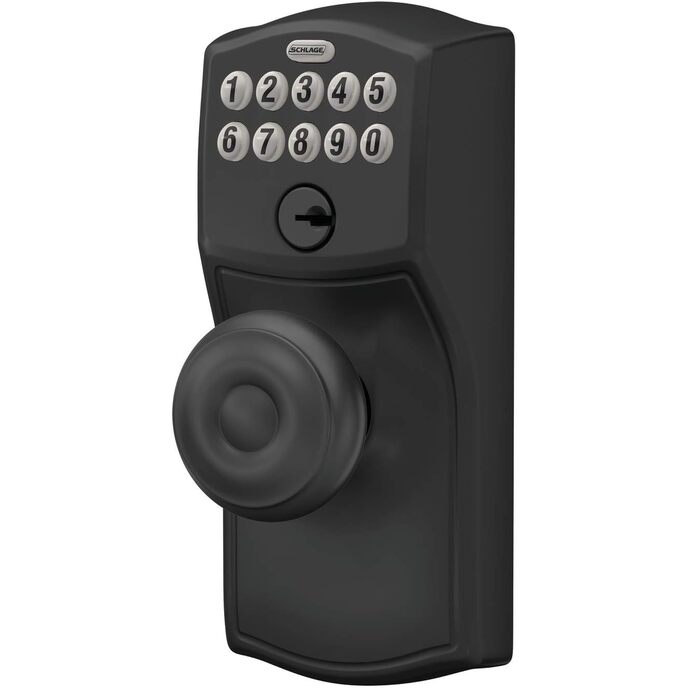
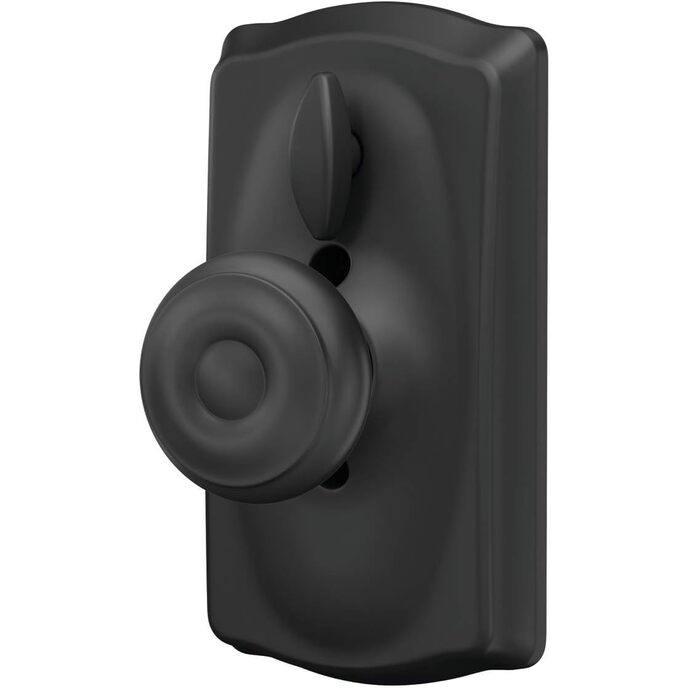
This review is about the Schlage brand keyless locks that have "FE595" in their part number, such as this FE595 PLY 626 ELA. Note that there are quite a few similar-looking Schlage keyless locks that have other numbers such as BE365 or FE575, and I think most people would want this FE595 model, so be careful when shopping. I play big musical instruments, and was getting tired of searching for my front door key while carrying those big horns and other stuff as well. I finally got around to replacing the front door knob/lock with this keyless one. I selected the Schlage FE595 because it seems to be one of the better ones in terms of durability and reliability, has a nice look, a good combination of desirable features, and the physical key-type of the backup keys is compatible with my existing door locks on the house and garage (all are keyed-alike….I had the local locksmith change the tumblers in this FE595 lock to match my existing house key, this cost me $17 for the service and it took 15 minutes while I waited). For anyone who does not care to match this lock to their existing house key, that step is certainly optional and the new lock comes with two keys ready to be used. The keys are important, because they give you emergency entry if you forget the 'user code' for keyless entry, or if the lock battery is too weak, or if the keyless part of the lock should ever fail. Note that the way keyless locks such as this FE595 work, the mechanical part of the lock is ALWAYS locked by default. Entering the user code causes the electronic part of the lock to unlock the mechanical part for a few seconds, during which time the knob/lever can be moved to open the door. Inserting the key also causes the mechanical part of the lock to be unlocked. If the electronics should fail, or the battery runs down, the mechanical part of the lock remains locked, but you can still get in using the key. Failure of the electronics, or the battery, does NOT result in the lock opening by itself. The new lock seems to be very solidly made, nice heavy metal construction, the only plastic is on the hidden baseplate that exists to hold the 9V battery inside the inner half of the lock. Removing two screws gives access for replacing the battery, which Schlage recommends be done annually. Schlage recommends against using rechargeable batteries, and also against using lithium batteries; while they might have a longer life, they give no warning of failure and then will suddenly stop working. Use of a regular alkaline battery allows the lock to sense impending battery failure and warn you (by changing to color of the LED lighting for the keypad). The lock comes pre-programmed with two 4-digit 'user codes. The owner can easily and simply reprogram the lock to add or delete one or more ‘user codes’. For example, different members of the family might find certain 4-numbers easier to remember, and each can have their own preferred code programmed into the lock. Up to 19 user codes may be in the lock at the same time. Pressing the buttons for any of the user codes will open the lock. Each time a valid user code is entered on the keypad, the lock will open for a few seconds, then will re-lock itself. The secondary small knob on the side of the lock that is inside the house determines if the lock automatically re-locks or if it stays open once unlocked. This is equivalent to the little knob found on most keyed door locks. This feature (to keep the lock from automatically re-locking itself) is not present on most other Schlage keyless lock models. Above the keypad is a large button that is labeled "Schlage". The LED light in this button flashes during programming, but most of the time you can press this button to cause the keypad buttons to light up, such as when opening the door when it is dark so you can see which button is which. The lock can easily be programmed with user codes to allow guests or temporary contractors (workmen, maids, etc) to enter, and then easily defeat those temporary codes later on. A special code can be entered to defeat ALL user codes, for when you plan to be gone for a while and don’t want the lock to admit anyone, regardless of which user code they might try to enter. This ‘vacation’ mode can be cancelled either by using the key to open the lock, or by entering a longer code (sort of like the lock's unique serial number) that you could write down and take with you on the trip. This special code is provided on yellow stickers on the front of the manual and also inside the lock cover on the inside of the door (you would have to get into the house, then remove two screws to access that particular sticker). I just used a Sharpie pen to write this code on the inside of the door frame where it would not be seen unless specifically looked for; I expect to use it rarely. Nothing special is required to install the lock. It goes in exactly like any other door lock/knob, using only a Philips screwdriver. Doors with conventional dimensions for the hole positions and diameters, and door thickness, will require no preparation work to be compatible with this lock. There is no need to hire anyone to install the lock, but here are the basic steps: - Remove the old lock from the door. - Insert the new latch/bolt assembly and strike plate to the door (or if your old lock was a Schlage, those parts are identical to the same parts on the new lock, so you could optionally re-use the old parts). If desired, replace the old strike plate on the door frame with the new one that comes with the lock. Strikes and strike plates are provided in two versions, with or without rounded corners. - Place the outer part of the lock (the part with the keypad) against the outer face of the door, and adjust the so-called "hands free" screw so that it protrudes about 1/4" beyond the inner face of the door. Snap the 'baseplate' to the inside of the door (it has fingers that align with protrusions on the outer part of the lock, and a ratchet engages the 'hands-free' screw's threads, effectively holding the baseplate and outer lock to the door, so you don't have to struggle to keep those parts from falling off of the door while you work. - Plug the little cables from the outer lock and the baseplate together; they are already connected to the 9V battery connector. - Install the 9V battery onto the baseplate. - Place the inner part of the lock over the baseplate and use the included two long screws to attach the inner lock part to the outer lock part (just like with most door locks). When it comes time to change the battery once a year under normal usage, you just remove those same two screws, pull the inner lock part away from the baseplate, change the batter, screw the inner lock part back, and you are done. - The two handles (levers) attach to their shafts by pressing them on until they snap into place. The lock comes with a special wire key that can be used to remove the handle levers from their shafts. You would only need to do this if you mistakenly installed the levers facing the wring way, or if you wanted to relocate the lock to a different door that swings the other direction. If you lose the special key, any piece of stiff wire, like a piece of coat hanger wire, could be used instead. - If you choose to just use the pre-programmed user codes, there is nothing else to do. - If you wish to program your own user codes, the process is: enter the longer 'serial number' code, and the SCHLAGE button lights up and flashes three times; press the SCHLAGE button and the keypad lights up blue (your prompt to enter commands or codes), then press the '1' key to command the lock to accept a new user code, the SCHLAGE button flashes three times to acknowledge that it is ready to accept the new user code, then you enter the new user code twice, and once the lock accepts that both codes are the same and not duplicating an existing code, and the new code is not invalid due to wrong number of digits, the SCHLAGE