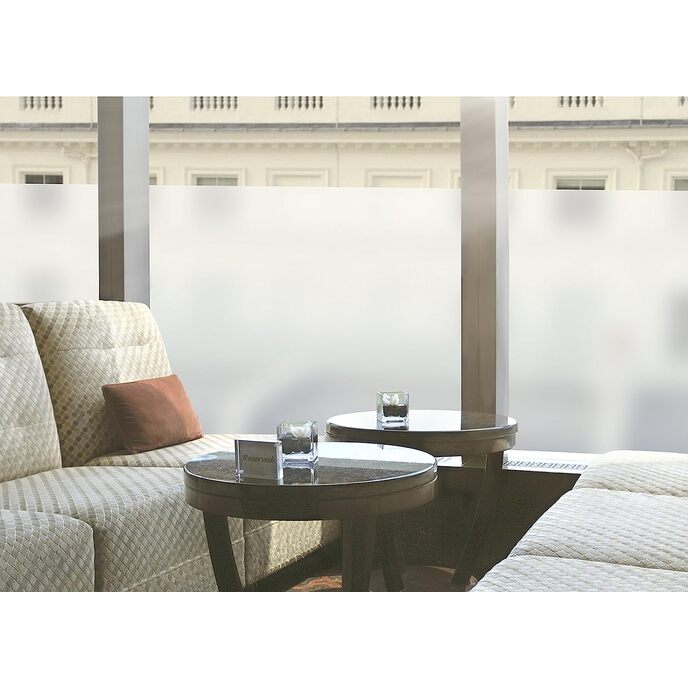
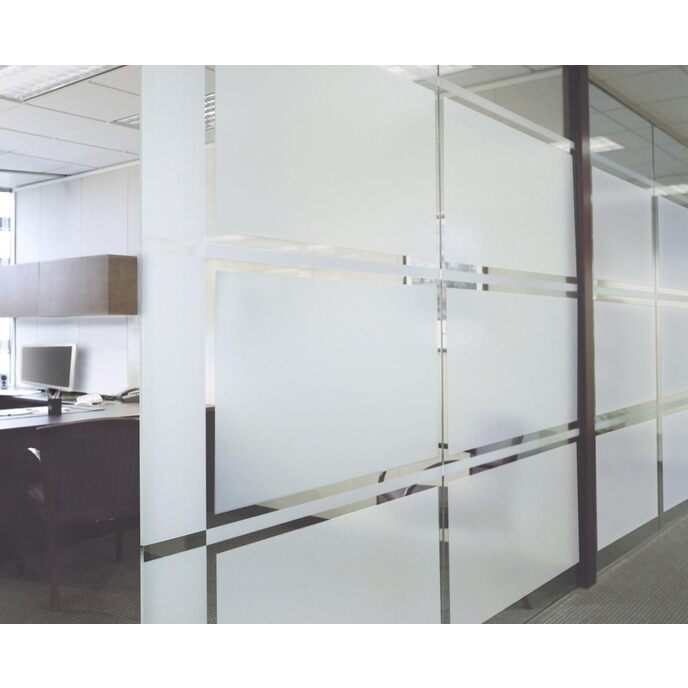
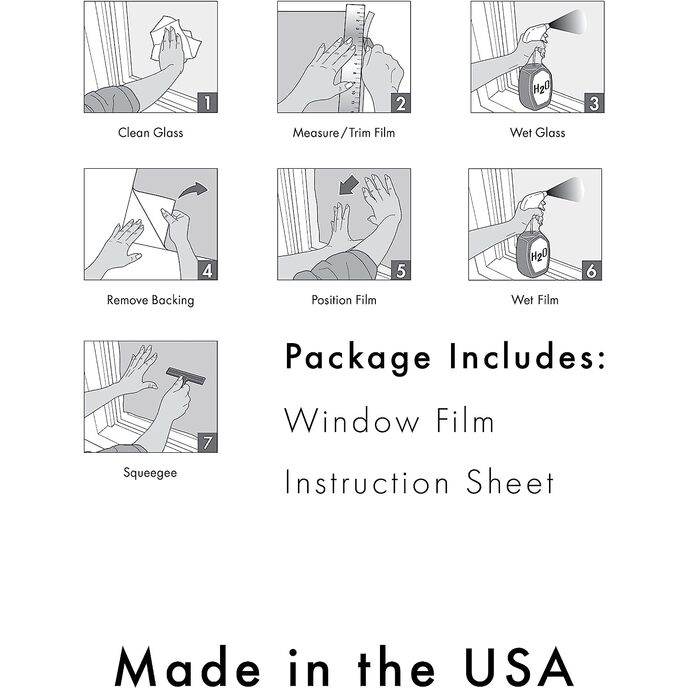
Most important - I purchased this way cheaper here on Amazon than a roll I bought at Home Depot. It was $35 at Home Depot and $20 on Amazon. The packaging of the Amazon one is a little different, being in a brown cardboard box. The one at Home Depot is in a clear plastic box. They appear to be identical other than that and the inclusion of a squeegee with the Amazon one. So, a much better deal buying on Amazon and you also get the squeegee! (Update March 2020 - another package I ordered looked just like Home Depot's package and did NOT include the squeegee). Besides that, I do really like this product. I was able to ramp up our privacy significantly using this on our front door, and several windows throughout our home. My biggest issue with it is that it is really hard to remove all of the bubbles and to achieve perfection. It can look like it's done perfectly, but then when you come back later, bubbles can form again. In particular, I noticed that when I came back at night, and with the light shining from the inside, I found all sorts of bubbles that weren't visible at the time of install. Through trial and error, I amassed some tips: 1. Cleaning your window as thoroughly as possible prior to install is very important (but virtually impossible to make it absolutely perfect). I started by using a razor blade to scrape any excess vinyl that was in the window corners. That tends to be a spot where the window is imperfect and there can be a little bump of excess vinyl there which can hinder the install and cause frustration. After doing that, I cleaned the window. Then I took a straight razor blade and scraped the surface of the window. Then I cleaned the window again. Then, I used my camera lens rocket blaster to blow any remaining debris from the window as best as possible. That helped with tiny pieces of hair and debris. I imagine a hair dryer would work too. Then, I sprayed the water solution and applied the film. 2. Part of my install routine was to get the window looking good during the day, and then come back at night and push out remaining bubbles. It's much harder to get those bubbles out after everything has dried, however. I found a plastic putty knife to be the most effective at removing those bubbles after install, since it is firmer than a squeegee. And I had to get pretty aggressive with the putty knife. The good thing is that the film is pretty durable and stands up to a pretty aggressive scraping. For really stubborn bubbles, use the corner of the putty knife. I have found the best thing to do is to come back to the window once or twice to try and make it look as good as possible, and then stop focusing on it or you'll go crazy trying (in vain) to make it perfect! 3. Sometimes you might find a hair or piece of dirt lodged beneath which then requires peeling back the film, washing out the offending piece, spraying more water/soap, and going through the process of removing bubbles again. A lot of times these pieces of debris aren't noticeable until nighttime when light shines on the window from the opposite direction. 4. The other thing is that it's important to leave the tiniest margin around the film. If you try to get every single bit of your window covered, it is really hard to get the bubbles out and the corners will lift up and look bad. It's tempting to try and cover every square inch, and I am guilty of that. But it proved frustrating, and I ended up removing and throwing away that film, as it got so messed up from trying to make it look smooth. 5. If you want only part of your window or door covered, try doing some stripes to transition between the opaque and clear sections. I did this on our front door and several windows and have received numerous compliments!