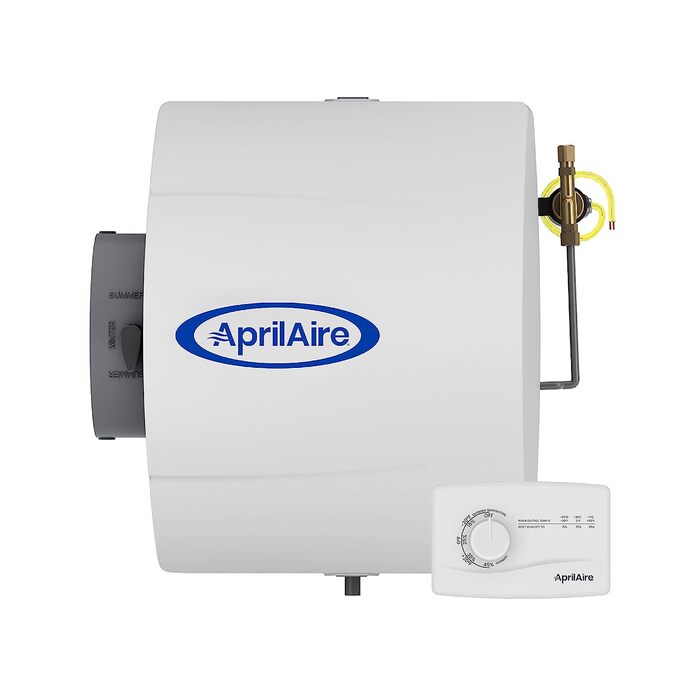
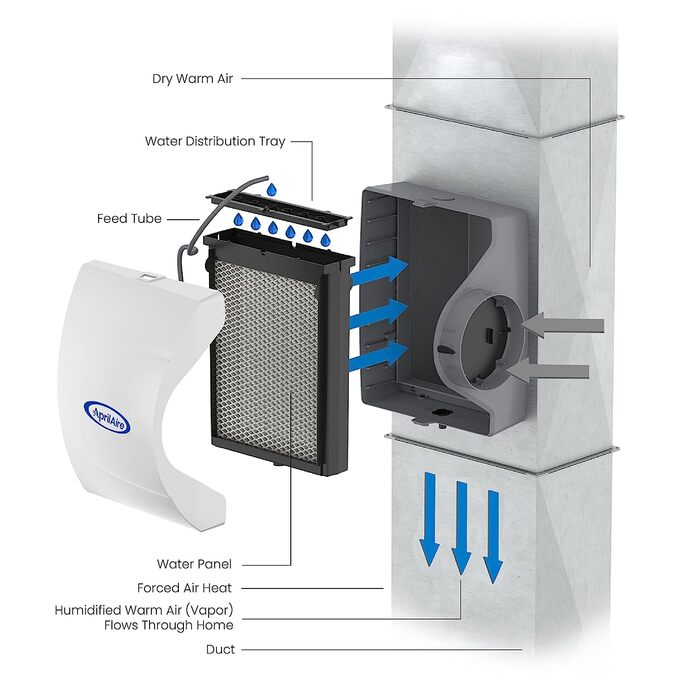
Aprilaire 600M Humidifier and 3rd gen Nest Thermostat Install This is a fairly easy project, but there are many steps involved, and a lot of info to gather. I am writing this so you should have everything you need in this review to do the project. There are many wiring diagrams you may stumble upon. I have included the 2 best ones I have found. I only had 4 wires in the bundle run to my thermostat. I had AC, heat, and fan. I ran 18/8 wire so I would have 8 wires total. Then I could have 1 for common so that the nest would always be powered, and * for the humidifier, 2 more than my original 4 bringing the total to 6 wires, leaving 2 extra to futureproof. The 18/8 wire is more expensive per foot, but I only needed 30’ (bought locally). 18/7 comes in a 50’ roll, so the price was the same. Just measure how much you need, then add about 5-10’ to be safe. Some systems have dual fan speeds and such, which are many times not used, but the nest may be able to use them. Find your furnace manual online or look at the wiring diagram(s) inside the furnace access covers if there are any. If you have to run more wire, plug the wires in to the nest setup website, so you can use the same colored wires they did to minimize confusion. If you have extra unused wires, put both ends in a wire nut to be safe. I first wired everything without the included transformer and was using the furnace’s built in transformer, see attached wiring diagram. When I first turned everything on, it all seemed to work fine for about 5 seconds, then smoke blew out the side of the solenoid valve! I turned the heat way down and let the furnace finish its cycle and the solenoid valve got pretty hot so there was definitely a short. Amazon sent me a new solenoid valve so no big deal there. The reason for using the included transformer with the relay is to isolate the humidifier solenoid from the furnace and Nest, and this experience proved to me why that would be important! The downside to having a dedicated transformer to the humidifier is that it is always on, and drawing extremely minimal power, but its still power. You may be able to wire the 110V side of the transformer to the extra contacts on a 6AZU3 relay so that there is no such loss, or maybe the relay can control the 110V side and then 24V side always stays connected using the 6AZU2 relay, do some research and try it! I mounted the relay and extra transformer inside the furnace next to the control board. I took the solenoid apart, and it looks like the windings shorted out to the outside case. I’m not sure if it would cause more harm than good, but you could take apart the solenoid before powering it up to check that nothing is shorting with the outer casing, maybe add some electrical tape around the windings, but you risk damaging the wires that power the solenoid. If you need/want to take it apart, take off the nut on the end, then the small rubber grommet. Now the electrical part of this should slide off the shaft. The slotted part (for a flathead screwdriver) does not need to be taken off, that just holds the water valve in. Then push the yellow wires in to the housing while carefully working the windings out of the housing. Keep in mind that the Nest does not have a built in table to decide what humidity you need for a given outside temperature, as described in the Aprilaire operating manual. I have read that the Ecobee thermostats have this kind of table built in. There is a website mynestreports that has some custom settings you can use, including this very table, for the Nest. His values are exactly what is in the Aprilaire owners manual for the M versions. You just log in with your Nest login, and check the boxes and it works. Many complain about this, so I wish Nest would add this feature to the software! Also, the Nest and the app, configured in Hum. will allow you to adjust the Rh more precisely while the Hum. + heat option shows you rain drops on a slider scale. The rain drops do correspond to a 5% increment, as verified on mynestreports.com. So if you set the Aprilaire up using hot water, everything else the same, and you could control the fan, you could use the Hum. setting and see the Rh. Minor point. I’ve run the humidifier now for about a month, and after the house absorbed the moisture, the setup holds my set humidity well. I added 5% to the humidity numbers in mynestreports for everything below 40%, so 40 % is repeated. This is because my heater runs a long time in the morning to warm the house back up from being turned down at night. The day temps are higher, so I wouldn’t get as much humidity as I could because the morning heat run would cut the humidifier early for the current morning temp. Basically, on mynestreports you can see how long the heater has been on, and how long the humidifier has been on. If the times are the same the humidifier is on whenever you are heating and you are getting as much humidity as you can using cold water. Just keep an eye on the windows for any condensation. Keep in mind that the advertised size of house that the Aprilaire 500 and 600’s can humidify is probably based on using hot water to evaporate more water. I have an on demand heater, so I did not want to run the water heater all the time. I therefore bought the 600M so that cold water would work better. It seems overkill, but the prices are very comparable especially through Amazon Warehouse. Also, the yellow plastic orifice in the discharge tube is the same for the 500 and 600, so you are using the same amount of water either way, and electrically they are identical. Also, the 400 requires you to change filters twice per season, but it is more efficient with the water. You will need a drain of some kind for the 500 and 600. My furnace had a small pump on the side to catch water from the furnace and AC, so I just put the drain in the 3rd hole, works fine. I used a duct for a rectangular register, and cut it and bent it with some snips and sheet metal pliers, then sealed the edges with foil tape. If you look closely at one of the pictures, you can see that I left the corner of the duct intact, and its more of a vane now. I just used some pliers and sheet metal pliers to bend the corner into a flat plate, this keeps the duct more rigid. Your installation may be different, but try to minimize how long of ducting you need and turns. I almost had to move/modify my furnace vents, but there was enough clearance, keep this in mind for your installation. Also, consider using a level when cutting your opening and installing the unit, the water distributes in a tray on top, and you want it distributing evenly. There is a “Nest Pro Installation Guide” available. There are some wiring diagrams in there, which can be useful, but not complete or straightforward. The diagrams I have included should work for the nest. They recommend a different relay, but they do the same thing. You will need to go into the pro settings, just hit continue and ok etc. Use the dial to move down to the *. Select it, and set it up for being a humidifier. In the pro install guide, it says “Pro Setup will show an Activate setting to specify whether heat needs to be activated for humidification to turn on. Bypass humidifiers should use the Hum. + heat option while steam, independent, or on-demand humidifiers should use the Hum. only option.” So in this case that means the humidifier will only turn on when the heat and fan is on. You can set this up to run the humidifier with the fan, and no heat, but you will need to plump the humidifier to hot water then, see the Aprilaire manual on their website. The 600M came with a saddle valve (I have read these are not the best), the manual humidistat, evaporation panel and all internals, but no wiring, ducting, or plumbing. Keep in mind the warranty is voided if you install it and are not a professional. The only part I could see breaking is the solenoid valve, and those are ~$30. Here are some links to useful tool